Quoting Someone Else’s Work in Your Book: Song Lyrics, Photos, and Poetry

Quoting Someone Else’s Work in Your Book: Song Lyrics, Photos, and Poetry
concept art of a book with a yellow hardcover and the word “quotation” in white lettering on the spine

Books and other creative works rarely exist in isolation. Older works often inspire authors, their characters, and the stories that surround them. Many authors also quote a poem, mention a song, reproduce a photograph, or include a short passage from another writer. These references can add context and setting, illustrate an idea, or make a book more engaging, but they can also raise copyright and licensing questions.

Do you need permission to quote song lyrics, poetry, or photos in your book? Usually, yes. The main exceptions are works in the public domain, uses that qualify as fair use, and references that name or describe a work in your own words. Because poems and songs are short, even one line can be too much, and the US Copyright Office says no number of words is automatically safe.

Overview and Goals

Simply naming the original creator or providing a citation does not automatically give you the right to reproduce their work. Using copyrighted material without permission can result in unexpected licensing fees, delayed publication, and the need to remove or revise the material. In some cases, a copyright owner can sue an author.

Fortunately, you do not need permission for every reference to another person’s work. Some works are in the public domain, while certain uses of copyrighted material may qualify as fair use.

Identify any third-party material early, determine whether it is protected by copyright, and decide whether you need permission or can rely on fair use. Taking care of these questions before publication gives you time to obtain any necessary rights, revise your manuscript, or find an alternative if necessary.

This guide serves as an introduction to US copyright considerations for authors. It is general information, not legal advice, and authors with substantial or disputed copyright claims may want to consult a copyright attorney before publishing their book. For a broader introduction, see our guide to understanding copyright protection.

Before quoting or referencing someone else’s work in your manuscript, determine exactly what you want to use and why.

Start by identifying your purpose. Are you analyzing a poem? Discussing the meaning of a song? Reproducing a paragraph to illustrate a historical event? Including an epigraph simply because you like the passage and how it ties into your story?

The purpose of the use can affect the legal considerations, and it also helps you plan permission requests early.

If you know that your book will contain song lyrics, poetry, photographs, artwork, or other copyrighted material, do not wait until the final proof to investigate your rights. Permission requests can take time, and some rights holders may charge a fee or even decline your request.

Your overall priority should be to minimize legal and financial risk while preserving what your book actually needs. Sometimes that means obtaining a license or shortening or changing a quote. Other times, you may be free to use the material simply because it is in the public domain or because your use qualifies as fair use.

When You Do Not Need to Seek Permission

Not every reference to another person’s creative work requires permission. Copyright protects original expression, but it does not prevent authors from making ordinary references to copyrighted works.

Public Domain Works

Works in the public domain are not protected by copyright and generally may be used without obtaining permission. A work enters the public domain when the copyright expires or when copyright law never applied to the original work.

In the US, copyright duration depends on when and how a work was created and published, as well as other factors. Works published in different periods and different countries can be subject to different copyright terms. Special rules may apply to anonymous works, pseudonymous works, and works made for hire. Certain editions, translations, and adaptations of older works can contain new copyrighted material even when the original work is in the public domain.

Because copyright duration can be complicated, do not assume that an older work is automatically in the public domain. When in doubt, search the item’s copyright status through a reliable source, such as the US Copyright Office, before reproducing it.

Song and Movie Titles

Titles, names, and short phrases are generally not protected by copyright. That means you can ordinarily mention the title of a song, movie, book, or other work without asking the copyright holder for permission.

That does not mean every use of a title is automatically free of legal considerations. Trademark law, publicity rights, and other laws can apply in particular circumstances. For ordinary references within a book, however, simply naming a song or movie is different from reproducing its copyrighted content.

Referencing Instead of Reproducing

If you want to discuss another person’s work without reproducing its copyrighted expression, you generally do not need permission. You can identify the song, poem, book, movie, photograph, or other source and discuss it in your own words.

Instead of reproducing an entire poem, for example, you might summarize its central theme and identify the poem and poet. Instead of printing several lines from a popular song, you might explain how the lyrics relate to the subject of your book.

The key is to discuss the work in your own words rather than reproducing its protected expression. This approach may substantially reduce copyright issues associated with reproducing someone else’s creative work.

Fair Use Considerations for Song Lyrics and Poetry

Fair use is a legal exception that permits certain uses of copyrighted works without permission from the copyright holder. Common examples include criticism, commentary, parody and satire, news reporting, teaching, and research. For example, someone reviewing a copyrighted work may be able to share certain lines of dialogue from the book or film.

Intent matters, but so does scope. Although there are no specific rules about how much of a work can be reproduced under fair use, the amount used and whether the excerpt represents an important or distinctive part of the original work are both considerations. A good starting point is to use no more of the work than your purpose requires.

This becomes tricky, however, with poems and song lyrics. Because these works are generally short by nature, even a single line can be considered a substantial portion of the original work.

Courts weigh the four factors in Section 107 of the Copyright Act when deciding whether a use is fair:

  • Purpose and character: What role does the quote play in your book? Are you using the material to criticize, analyze, comment on, or parody the original work, or is it simply for decoration or entertainment?
  • Nature of the copyrighted work: Creative works are strongly protected under copyright law, making their use more difficult to justify than factual material.
  • Amount and substantiality: Are you quoting a portion of the work or the whole piece? What percentage of the whole is the segment you are using?
  • Market effect: Could your use of the work interfere with an existing or potential market for it? Does your reproduction point to or draw away from the original?

If you decide to rely on fair use, document your reasoning. Record what you used, how much you used, why you used it, and how the material contributes to your book. Your analysis does not guarantee that a court will agree that your use is fair, but it gives you a clear record of the decision you made and the factors you considered.

When You Need Permission to Quote Song Lyrics or Poetry

If your planned use of a protected work does not clearly fall within an exception such as fair use, it is a good idea to obtain permission before you finalize and publish your book.

Permission should generally be sought when you want to reproduce substantial portions of a song or poem, particularly when the quotation is being used primarily as decoration or as an epigraph rather than for commentary or criticism.

Full verses, choruses, stanzas, or other substantial excerpts should be treated with caution. Even a short quotation can raise concerns if it contains a particularly important or recognizable portion of a work. The US Copyright Office specifically notes that there is no predetermined number of words or lines that can be safely used without permission.

The more central a quotation is to your book, the more important it is to start the permissions process early. Waiting until publication is approaching can leave you with little time to negotiate a licensing agreement or rewrite the affected sections.

How to Identify the Copyright Holder or Rights Holder

Identifying the correct rights holder can sometimes be more difficult than requesting permission.

Start with any information associated with the original work. For songs, music publishers, performing rights organizations, and other industry databases can help identify songwriters and publishers. ASCAP, BMI, and SESAC may provide useful information about musical works and their rights holders.

For books and poetry, check the original publisher, the author’s representative or estate, and available copyright records. For photographs and other visual works, begin with the photographer, agency, archive, or organization that originally published the image.

The US Copyright Office also maintains public records that can help authors investigate registrations and transfers of ownership. If you cannot identify the copyright holder, do not assume that the work is free to use. Document your search and consider finding an alternative or seeking legal advice.

How to Seek Permission and Draft Permission Requests

When requesting permission to use a copyrighted work in your book, your request should give the copyright owner enough information to understand exactly what you want to use and how you plan to use it.

Your request should include:

  • Your name and contact information
  • The title and author of the work you want to quote
  • The exact excerpt you want to reproduce
  • The word count of the excerpt
  • The title of your book
  • A brief description of your book
  • How the quotation will be used
  • Whether the book will be available in print, digital, or other formats
  • The territories in which you plan to distribute the book
  • Your expected publication date or manuscript status
  • The rights and license term you are requesting

Be specific. A rights holder cannot meaningfully evaluate a request for “a few lines from the song” without knowing which lines you intend to use and how you intend to use them. If you have already written the passage into your book, you can include that section as an excerpt in your request as well.

When appropriate, request nonexclusive rights rather than exclusive rights. You generally need permission to reproduce the material in your book, not ownership of the underlying work itself or exclusive usage.

Negotiation, Fees, and Publisher Responsibilities

Getting permission to use another person’s creative work does not necessarily mean you can use it for free.

A rights holder may grant permission without charge, request a licensing fee, impose conditions on the use, limit the formats or territories covered, or decline the request entirely. The cost can vary considerably depending on the work and the requested use.

If your book depends on third-party material, build potential permission costs into your publishing budget before you commit to the material. Also allow several weeks, or longer when necessary, for rights holders to respond.

If you are working with a publisher, ask whether the publisher has a standard permissions form or specific requirements. Publishers may have their own procedures for documenting permissions and reviewing third-party materials. Many publishing agreements also ask the author to confirm that all third-party material is cleared, so read yours with care. Our guide to vetting a publishing contract covers what to look for before you sign.

Do not assume that sending a permission request is the same as receiving permission. Before publication, obtain the written license or approval and make sure it covers the actual use you intend to make.

If You Cannot Find or Obtain Permission

Sometimes you cannot locate a rights holder, or they deny permission. An unsuccessful search does not automatically make a copyrighted work free to use.

Document your good-faith efforts to identify and contact the rights holder, including the databases, publishers, organizations, and other sources you searched.

Then consider alternatives. You may be able to:

  • Remove the quotation.
  • Paraphrase the underlying idea in your own words.
  • Replace the material with a public domain or Creative Commons alternative.
  • Rewrite an epigraph or chapter heading.
  • Revise the passage so that any quotation is truly needed for commentary or criticism, which supports a fair use argument.

Creative Commons material can provide useful alternatives, but “Creative Commons” does not mean no restrictions. Different licenses impose different requirements involving attribution, commercial use, adaptations, and other conditions. Review the specific license before using the material.

Special Rules for Images, Photos, and Other Media

Photographs, illustrations, artwork, screenshots, and other visual material should be treated with the same care you would give written quotations.

Finding a photo online does not mean you have permission to reproduce it. Copyright protection can apply to photographs and other visual works even when they are freely accessible online.

Before including an image in your book, determine:

  • Who owns the copyright?
  • What license or permission applies?
  • Does the license permit use in a commercial book?
  • Does it permit print and digital distribution?
  • Are attribution requirements involved?
  • Are modifications or cropping permitted?
  • Are there restrictions on territory or distribution?

Stock photography can simplify this process, but read the specific license requirements before assuming you can use a stock image for any purpose. If an identifiable person appears prominently in a photograph you plan to use commercially, a model release or other permission may be needed for your intended use.

Creative Commons images can also be useful. A CC BY license permits commercial use and adaptation as long as the required attribution is provided. Other Creative Commons licenses may restrict commercial use or prohibit adaptations.

Sample Permission Request Outline

A simple permission request might follow this structure:

Subject: Permission Request for Quotation in [Book Title]

Dear [Rights Holder],

My name is [Author Name], and I am the author of [Book Title], a [brief description of the book]. I am requesting permission to reproduce the following material from [Original Work Title] by [Creator]:

Exact excerpt:
“[Quoted material]”

Word count: [Number]

I would like to use this excerpt in [chapter/section/page description] of my book, where it will [briefly explain its purpose].

I am requesting non-exclusive rights to reproduce the excerpt in print and electronic editions of the book, distributed [territories], for the term of copyright or the longest license term you are able to grant.

The manuscript is currently [in progress/complete/in production], with anticipated publication in [month/year].

Please let me know whether you control these rights and whether there are any fees or additional conditions associated with permission.

Thank you for your consideration. I can be reached at [email address] or [phone number] if you need any additional information.

Sincerely,
[Author Name]

If a publisher or licensing agency provides its own permission form, use that form instead. Always adjust to the rights holder’s requirements to increase your chances of a positive response.

Legal Risk Management and Recordkeeping

Managing permissions is easier when you treat it like part of your book’s production records rather than an informal collection of emails.

Create a permissions file for your manuscript that includes:

  • Copies of all permissions requests
  • Responses from rights holders
  • Signed licenses and agreements
  • License fees and payment records
  • Dates permissions were granted
  • Specific excerpts or images covered by each permission
  • Approved formats and territories
  • Attribution or credit requirements
  • Expiration dates and other limitations
  • Notes about any fair use analysis you performed

Make sure the final license actually matches the way you plan to publish the book. A license specifically covering a print edition may not necessarily cover every other format or use. Some licenses also require a specific credit line, which authors often place on the copyright page. Our guide to what goes on a book’s copyright page shows where permissions and credits fit.

If a rights holder disputes your use, or if the material is particularly valuable or legally sensitive, consult an intellectual property attorney rather than trying to resolve the dispute yourself.

Quick Pre-Publication Checklist

Before sending your book to production, take the time to review every piece of third-party material as well as its corresponding records. One final check can help ensure that you do not overlook potential copyright issues that could result in a dispute or delay publication.

Use the following checklist to review your book before publication:

  • Confirm the copyright status of each poem, lyric, photograph, or other work you reproduce.
  • Determine whether your use requires permission or may qualify for an exception such as fair use.
  • Obtain written permission for material that requires a license.
  • Verify that image licenses cover your intended print and digital uses.
  • Confirm any required model releases or other permissions for identifiable people.
  • Check attribution requirements for Creative Commons and other licensed material.
  • Make sure licenses cover the territories, formats, and distribution methods you plan to use.
  • Keep copies of permissions and licenses with your publishing files.
  • Prepare replacement text or images in case permission is denied or unavailable.
  • Tell your publisher about any unresolved permissions before publication.

Third-party material can add considerable value to a book, but it should not become a last-minute legal problem. Identify what you want to use early, investigate the rights involved, and keep careful records. When permission is necessary, obtaining it before publication gives you one less problem to solve when your manuscript is ready to become a book.

Frequently Asked Questions About Quoting Other Works in a Book

Can I quote song lyrics in my book without permission?

Usually not, unless the lyrics are in the public domain or your use qualifies as fair use. Song lyrics are short, so even one line can be a substantial part of the work, and quoting lyrics as decoration or as an epigraph is the hardest use to justify. If you want the lyrics, request written permission from the rights holder, or describe the song in your own words instead.

How many lines of a poem or song can I quote?

There is no number of words or lines that is automatically safe. The US Copyright Office notes that no specific number of words, lines, or notes may safely be taken without permission. The amount matters, but so does whether the excerpt is an important part of the work and why you are using it.

Do I need permission to mention a song or movie title?

Generally no. Titles, names, and short phrases are not usually protected by copyright, so you can name a song or movie in your book. Naming a work is different from reproducing its lyrics, dialogue, or images, and trademark or publicity laws can apply in some situations.

Can I use a photo I found online in my book?

Not without checking the license. A photo can be protected by copyright even when it is freely visible online. Find the owner, confirm the license covers commercial print and digital use, and follow any attribution rules. Stock photos and Creative Commons images can work, but read the specific terms first.

Does giving credit or a citation count as permission?

No. Naming the creator or providing a citation does not give you the right to reproduce a copyrighted work. Credit is often required in addition to permission, but it does not replace it.

What if I cannot find the copyright holder, or they say no?

An unsuccessful search does not make the work free to use. Document your search, then remove the quotation, paraphrase the idea in your own words, or replace the material with a public domain or properly licensed alternative.

Ready to Publish Your Book?

Permissions work goes much more smoothly when it is finished before production begins. Every Page Publishing author works with a dedicated Publication Coordinator from signing through publication, a single point of contact who knows your manuscript and can answer your questions along the way. Raising any quoted lyrics, poems, or photos with that person early helps permissions questions come up before production rather than after.

If you are considering publishing your book, you can see what is involved in our breakdown of what it costs to publish with Page Publishing.

Questions about publishing a book that quotes other works? Call a Page Publishing consultant at +1 (800) 204-6099 to talk through your plans.
Four Stages of the Book Editing Process

Four Stages of the Book Editing Process

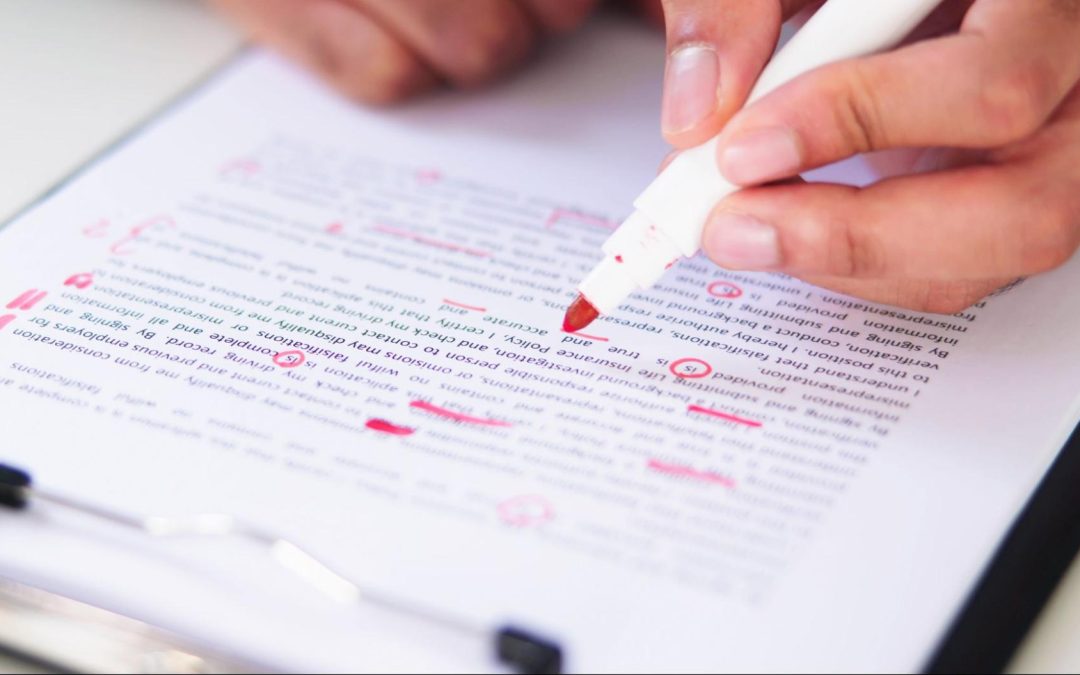
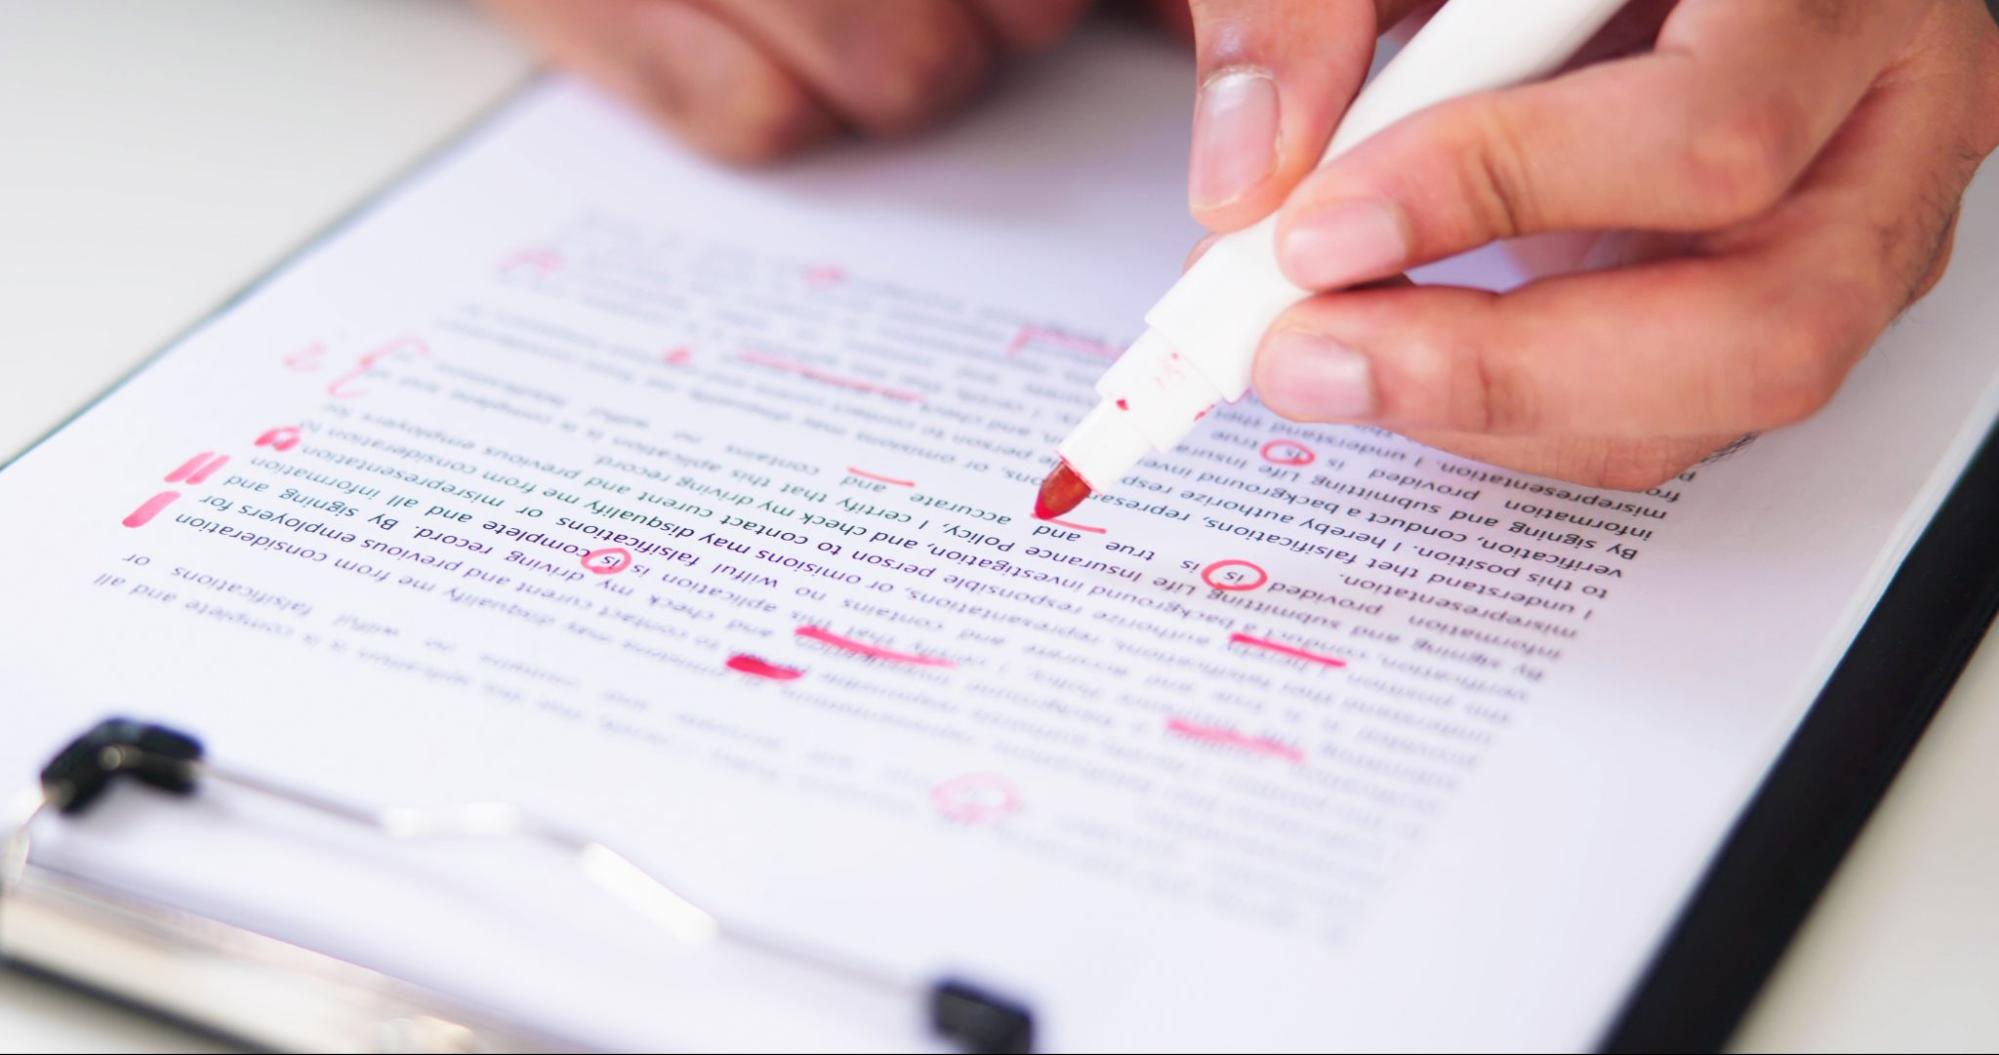
Close-up of a hand holding a red pen over a manuscript page on a clipboard, ready to proofread.

You did it: after months, or perhaps even years, of writing, rewriting, and staring at the same pages, you have finished your book. You might even have typed “the end” with a dramatic flourish or, at the very least, let out a satisfied sigh.

You should be proud; finishing a book’s first draft is a major accomplishment. However, it is only the beginning of the publishing process. A book that looks complete to the author can have plot holes, uneven pacing, confusing passages, inconsistent details, or simple spelling and punctuation errors. Because you have spent so much time with your own words, it can be surprisingly difficult to spot those problems yourself.

That is where editing comes in. Professional book editing is an important part of preparing your book for publication. But it is not just a single pass through your manuscript to make sure your i’s are dotted and your t’s are crossed.

Overview: What the Book Editing Process Covers

Book editing happens in four stages, each with a different focus and perspective. These stages include developmental editing, line editing, copyediting, and proofreading. The process starts with the biggest questions about your book’s story, structure, and purpose, then gradually narrows its focus until every sentence, word, and punctuation mark has been reviewed.

Understanding these four stages can help you determine what your manuscript needs, when you need it, and when to invest in a professional editor to turn your draft into a polished, publication-ready manuscript.

The four stages of book editing each serve a different purpose, moving from big-picture revisions to final technical checks:

  • Developmental editing: Examines high-level concepts in your book, including structure, plot, themes, character development, pacing, and overall effectiveness.
  • Line editing: Focuses on the writing itself, refining word choice, sentence structure, flow, tone, and voice to make each page clear and engaging.
  • Copyediting: Checks the manuscript for grammar, punctuation, spelling, syntax, consistency, and adherence to the chosen style.
  • Proofreading: Provides a final review of the formatted book, catching remaining typos, formatting issues, and other errors before publication.

Every author can benefit from professional editing. Even authors who are highly skilled at editing other people’s work need an outside perspective to identify issues or errors that they may have missed.

Authors are often too close to their own work to see every potential flaw. It is common to overlook plot holes and inconsistencies because an author’s mind naturally fills in the details that may be missing from the page.

While friends, family, and beta readers can offer valuable perspectives that help improve a manuscript, they are not editors. A professional editor brings specialized experience and an objective view to your book.

When you are planning your book editing timeline, consider when feedback from editors and beta readers will be most useful. Some authors bring in beta readers before a developmental editor gets involved. This lets them save money by identifying and fixing plot holes and structural issues before professional editing begins. Others, however, prefer to wait until after developmental editing, bringing the book closer to its finished state before sharing it with readers.

Stage 1: Developmental Editing for Big-Picture Work on the First Draft

Developmental editing is the first major stage of the editing process. Instead of focusing on individual sentences or grammar, developmental editing looks at the book as a whole. A developmental editor considers a book’s structure, plot, overall themes, character arcs, pacing, and scene progression.

For fiction, developmental editing may examine:

  • Plot: Does the story have a clear and compelling progression? Are there gaps, contradictions, or unresolved threads?
  • Character development: Do the characters have believable motivations and meaningful arcs? Do their choices make sense within the story?
  • Pacing: Does the story move at an appropriate pace, or are there sections that feel rushed or unnecessarily slow?
  • World-building: Is the world of the story developed consistently and clearly enough for readers to understand it?
  • Structure: Are the chapters, scenes, and major story beats arranged in a way that supports the overall narrative?
  • Point of view: Is the chosen perspective effective and consistent?
  • Emotional payoff: Do the story’s major moments feel earned, and do they deliver the emotional impact the author intends?

For non-fiction, developmental editing may focus on:

  • Structure: Is the information organized logically, and does each section contribute to the overall purpose of the book?
  • Themes: Are the book’s central ideas developed consistently throughout?
  • Thesis or central argument: Is the main idea clear, supported, and carried through the manuscript?
  • Clarity: Can readers easily understand the author’s ideas and follow the progression of the book?
  • Voice: Does the author’s perspective and writing style remain appropriate and consistent for the subject and intended audience?

A developmental edit does not worry about grammar, punctuation, or spelling. It is not particularly helpful to perfect a sentence that may be deleted, rewritten, or moved to another part of the book. You address those concerns later in the editing process.

That is also why it is important to hire a professional editor with specific developmental editing experience. An editor who is great at spotting an extra comma or suggesting a better word choice may not have the same ability to improve your novel’s pacing or identify a weak plot.

The goal of developmental editing is to make sure the foundation of your book is strong before moving on to the more detailed stages of book editing. If you are still shaping your story, our guide to outlining a novel can help you build that foundation.

Stage 2: Scene-Level Work and Line Editing for Stronger Pages

Once the overarching themes and structure of your book are working, the next stage in editing is to consider each scene and line of text individually.

Scene-level edits examine the purpose and effectiveness of each scene or situation in your book. They look at how a scene advances the plot, develops the book’s ideas, and contributes to its overall pacing and structure. Each scene should have its own purpose and momentum, with a clear beginning, turning point, and ending, while also serving the larger story.

Many scenes also establish “stakes” for the characters. Stakes are what a character stands to gain or lose because of their actions. They give both characters and readers something to care about and a reason to keep going. Strong scenes connect those stakes to the larger story, giving each scene a clear purpose.

Line editing, another central part of this stage, focuses on word choice, sentence structure, and flow. It helps ensure that sentences are clear, effective, easy to follow, and carry the reader forward. Line editing also helps to ensure a consistent tone throughout the manuscript while shaping and preserving the author’s creative voice.

While a developmental editor may also provide feedback on individual scenes, a professional line editor is often best suited to shape each sentence to support the overall plot and storylines. A line editor can identify unnecessary repetition, awkward phrasing, unclear passages, weak word choices, and other issues that may keep otherwise strong writing from reaching its full potential.

If you make major changes during this phase, it can be helpful to re-engage beta readers for another review. Their feedback can help you determine whether the revisions improved the reading experience and whether the changes introduced any new issues.

The goal of this stage is to make sure each scene and passage is contributing to the book as a whole, while also ensuring that the writing itself is clear, engaging, and consistent. In the next stage, copyediting, the focus shifts from the writing’s effectiveness to its technical accuracy and consistency.

Stage 3: Copy Editing for Technical Fixes Across the Entire Book

Copyediting is one of the final phases of book editing and focuses on grammar, punctuation, syntax, spelling, and consistency. Copyediting helps ensure your book follows a desired style and stays consistent from the first page to the last.

For example, if you have a character named Ashley, the copyediting process would confirm that the name is spelled the same way throughout your book, rather than switching to Ashlee or Ashleigh partway through.

Some aspects of copyediting overlap with line editing, particularly when it comes to word choice and tone. But while line editing allows more creativity and influence, copyediting focuses on practicality: accuracy, consistency, and tone. The copyeditor’s job is to make sure that every word and sentence makes sense, follows the appropriate style (such as the Chicago Manual of Style), and fits within the larger context of the manuscript.

Because these two types of editing require different skills and approaches, some authors choose to work with a professional copyeditor separate from their line editor.

Copyeditors may also review formatting to ensure consistency throughout the manuscript. This can include checking headings, spacing, capitalization, numbers, citations, and other recurring elements according to the book’s established style.

The goal of copyediting is to create a technically accurate, consistent manuscript that is ready for a final proofread before publication.

Stage 4: Proofreading and Final Polish Before Publication

While editing aims to eliminate errors, changes to the plot, scenes, and sentences can also introduce new typos or inconsistencies. Proofreading is the final editing stage before publication. It offers one last opportunity to identify and correct those errors before your book goes to print.

Proofreading is often best completed using the final PDF or ebook proof, ensuring that the proofreader is reviewing the version of the manuscript that your readers will ultimately see.

Proofreaders should look for:

  • Spelling: Misspelled words, names, and numbers, typos, and misused homonyms such as there, their, and they’re.
  • Punctuation: Missing commas and periods, punctuation errors, and correct placement of apostrophes and quotation marks.
  • Grammar: Subject-verb agreement, capitalization, dangling modifiers, and pronoun usage.
  • Formatting: Consistent fonts, spacing, and citation formats.

Some proofreaders read text backward, going word by word from the end to the beginning. This helps them focus on individual words and sentences rather than becoming absorbed in the meaning or context of the book. Reading aloud can also help proofreaders to spot missing words, awkward phrasing, and run-on sentences that need to be broken up.

These final checks matter if you want to present a professional publication that readers, booksellers, and librarians will want to buy.

Workflow: How To Run the Book Editing Process

When editing your book, follow the book editing stages in sequential order.

Proofreading before you have corrected major plot points, for example, will only lead to frustration and unnecessary work down the line. Starting with developmental editing and ending with proofreading allows you to follow a natural progression from the big picture to tiny details.

At each stage, you will want to create a revision plan. Decide whether you will address issues throughout the manuscript all at once or work through them in smaller sections. Consider the expected timeline for your editor’s review and the amount of time you will need for your own revisions. When working with a professional editor, make sure that you are both on the same page about timing and expectations to help the process go more smoothly.

Always leave extra time in your schedule. After completing your first draft, many authors find it beneficial to set it aside for a while before beginning the editing process. Letting your draft rest before editing can give you enough distance to see your work more objectively. This is especially important if you choose to self-edit your book, but can also be beneficial when working with professional editors.

Hiring and Collaborating With a Professional Editor

While many self-published authors choose to self-edit, hiring a professional editor brings specialized expertise and a fresh perspective that can elevate your book beyond what you may achieve alone. Professional editing can be a worthwhile investment in your book’s quality, publication-readiness, and even long-term success.

Always consider how an editor’s skills would be best used, especially if resources are limited. Our look at what DIY self-publishing actually costs can help you see where editing fits in your budget. If you are struggling to finalize or clarify the plot or pacing of your novel, you may want to focus on developmental editing. Some authors engage beta readers before this stage, getting valuable feedback from potential readers to help them simplify the developmental editing process.

Once you have narrowed down your list of potential editors, request a sample edit. This should be a paid exercise, giving each candidate a small sample of your manuscript and asking them to edit it. Using the same sample for multiple editors allows you to compare the editor’s style, notes, and feedback so you can choose the one that best aligns with your goals.

It is also helpful to clearly define your book and your big-picture goals before looking for an editor. Knowing your book’s ideal audience, where you hope to sell it, and a quick summary of the plot or thesis can help you find the right editor for your manuscript.

Beta Readers and Self-Editing: Prep Before Professional Editing

While beta readers are not editors, they often play an important role in the editing process. Some authors engage beta readers right before publication, when the book is nearly finished. For many self-published authors, beta readers are most valuable early in the editing process, before engaging a professional editor.

Beta readers review a draft manuscript and provide feedback from a reader’s perspective. Early beta readers may include friends, family, or fellow writers from local and online writing groups. They are typically not paid, though some services connect authors to beta readers for a fee.

Beta readers often offer candid feedback that identifies plot holes, flaws in character arcs, confusing sections, and points where they lost interest. This insight often helps authors prioritize revisions and address glaring issues before professional editing begins. Authors can also use beta feedback to prioritize developmental edits by asking an editor to focus on their biggest concerns.

If you are using beta readers early in your process, the key is to be upfront about the state of your draft. It is also helpful to give readers specific guidance about what you are looking for, whether that is feedback on pacing, plot, character development, or scene-level concerns.

The more specific your questions are, the more useful beta-reader feedback is likely to be. Rather than simply asking whether a reader liked the book, ask where they got confused, whether the pacing held their interest, or whether a character’s actions and motivations made sense.

While this feedback cannot replace the expertise of a professional editor, it can help you identify areas that need the most attention before your manuscript moves to the next stage of the process.

Final Checklist: Confirm Final Polish and Readiness

The goal of editing is to move your manuscript from a first draft to a polished, publication-ready document. When the editing process is complete, your book should go to print with a well-formed structure, good character development, clear themes, and as few errors as possible.

Here is a final checklist to make sure your book is ready before you send it to print:

  • Export your book: Export the manuscript as an EPUB or print-ready PDF for final review.
  • Confirm copy edits: Make sure that all copy edits have been implemented throughout the manuscript.
  • Proofread the formatted file: Complete a final proofread on the formatted version of your book.
  • Check consistency: Check the entire book for consistent spelling, capitalization, and formatting, names, terminology, or other recurring elements.
  • Review supporting files: Check corresponding documents, such as cover files and title, copyright, and acknowledgment pages.
  • Cross-check citations: Review any in-text citations to ensure they are complete, accurate, and consistent.

Once your review is complete, congratulations. You are now ready to publish your book.

Frequently Asked Questions About Book Editing

What are the four stages of book editing?

The four stages are developmental editing, line editing, copyediting, and proofreading. They move from big-picture concerns such as structure, plot, and pacing, to sentence-level style, to grammar and consistency, and finally to a last check of the formatted book for any remaining errors.

What is the difference between line editing and copyediting?

Line editing focuses on how the writing reads: word choice, sentence structure, flow, tone, and voice. Copyediting focuses on technical accuracy and consistency: grammar, punctuation, spelling, syntax, and adherence to a chosen style. Because the skills differ, some authors work with separate editors for each stage.

Does every book need all four stages of editing?

Every manuscript benefits from an outside review, and each stage catches problems the others do not. Your budget and the state of your draft may affect which stages you prioritize. An author who is struggling with plot or pacing may start with developmental editing, for example. Talk through your goals with a prospective editor so you can decide together what your manuscript needs.

Should I use beta readers before or after developmental editing?

Either approach can work. Some authors use beta readers first to identify plot holes and structural issues, which can reduce what a developmental editor needs to address. Others wait until after developmental editing so readers see a draft closer to its finished state. Our post on why skipping a beta reader is a common writing mistake explains what they can add.

How much does professional book editing cost?

Costs vary based on the editor, the length and genre of your manuscript, and the level of editing needed. The Editorial Freelancers Association rate chart can help you set expectations. To see how editing fits into a full publishing budget, read our breakdown of what it costs to publish with Page Publishing.

Can I edit my own book?

You should revise your own work before it goes to anyone else, but authors are often too close to their writing to catch every issue. Setting the draft aside for a while gives you more distance. Self-editing works best as preparation for professional editing rather than a replacement for it. For practical steps, see our guide to self-editing your book.

Ready to Publish Your Book?

Editing is the stretch of the publishing journey where a good draft becomes a book that is ready for readers. Take it one stage at a time, give each stage the time it needs, and trust that the care you put in will show on the page.

You can see how editing fits into the larger process in our guide to publishing print and digital books with integrated editing.

Wondering what editing and publishing would look like for your manuscript? Call a Page Publishing consultant at +1 (800) 204-6099 to talk through your options.

How to Keep Your Book on Track: Practical Strategies

How to Keep Your Book on Track: Practical Strategies

woman typing on a silver laptop in a room with red walls and shelves of books behind her

Writing a book is a major undertaking. Like any long-term project, it’s easy to lose focus and energy once the initial excitement wears off. A strong idea and a few good chapters can quickly turn into scattered notes, unfinished sections, research you meant to organize, and deadlines that keep getting pushed back.

When you lose steam on a book project that once excited you, the solution isn’t necessarily to write more. The trick is to create systems that show what you’ve accomplished, what still needs to be done, and where your attention should go next.

Building a few simple tracking habits into your writing process can help you maintain momentum from the first outline through the final draft. The good news is that tracking systems don’t have to be complicated, but they do need to reflect your vision for the book you’re writing. In this guide, we offer practical strategies to help you stay organized and focused throughout the writing process.

First Book Foundations

Tracking word counts and organizing research notes are helpful, but first you need to establish a few basic parameters for your project. Knowing what you’re writing, why you’re writing it, and what you want the finished book to accomplish sets a strong foundation for any decisions you make along the way.

Define Your Core Promise

First, define your book’s core promise. What should readers understand, learn, experience, or be able to do by the time they finish reading?

For nonfiction, this might be a specific problem your book will help readers solve or a question it will answer. For fiction, it could be the central experience or emotional journey you want the story to deliver. Your core promise doesn’t have to appear word-for-word in the finished book, but it should guide your choices throughout the writing process.

Every chapter and section should contribute to your book’s core promise. Even research should point to your book’s overall goals; while some of what you discover may never appear in your manuscript, it should help you better understand the subject or develop the book. If it doesn’t, it may not be worth your time.

Craft Your Elevator Summary

Once you know what your book aims to deliver to a reader, condense that idea into a short paragraph. This “elevator summary” should explain what the book is about, who it’s for, and what makes it worth reading.

Keep this summary somewhere easy to find, and revisit it as the manuscript develops. If the book starts changing direction, update the summary rather than continuing to work from an outdated description. A living summary can help you recognize when the manuscript has evolved, and when a new direction may be taking you too far from the original purpose.

Set a Deadline for Your First Draft

Set a target date for completing the first draft. Make sure that the date you choose is realistic and reflects the amount of work involved. Consider the time you have available to write, the length and complexity of the book, your research requirements, and other responsibilities like work and family.

A single deadline several months away can feel abstract, so break it into smaller milestones. For example, you might set interim deadlines for completing the introduction, each major section, or a certain number of chapters. 

The goal with a first-draft deadline is to create forward momentum, not to produce a perfect manuscript on the first attempt. Leave room for revision. A realistic schedule is one you can keep even when your initial enthusiasm wears off. 

Keep Track of Progress

Once you’ve established your goals and a first draft deadline, create a simple system for measuring progress. You don’t need to track every possible metric. Simply choose a few that give you insight into whether your book is moving forward.

Create a Weekly Writing Target

A weekly writing target gives you something concrete to work toward without requiring you to write every day. Depending on your project and schedule, your target might be a certain number of words, pages, scenes, sections, or hours of writing.

For example, a writer with limited weekday availability might set a goal of 2,500 words per week rather than trying to meet a daily word count. That lets them stay flexible throughout the week, writing when they have time and making up the difference with a longer session on the weekends.

You’ll want to choose a target that is challenging enough to create progress, but realistic enough that you can meet it consistently. If you set the bar too high and repeatedly miss your target, it can be discouraging. Simply adjust the target to something more attainable.

Log Your Time After Each Writing Session

Each time you sit down to write, make a note of your time and what you accomplished. Even a simple note such as “Tuesday: 45 minutes, 600 words” can provide useful information over time.

Tracking your sessions can help you identify patterns in your writing practice. You may discover that you write more efficiently in the morning or that certain types of work take longer than expected. You could also discover that a seemingly ambitious weekly goal is much less intimidating when it’s split into several shorter sessions.

Review Your Progress Every Week

At the end of each week, set aside a few minutes to review your progress. Look at what you’ve completed, what remains unfinished, and whether your current schedule is still realistic. Use this review to plan the following week. If you marked off every item on your to-do list, decide what comes next. If you fell behind, identify what got in your way before you set a new target.

A weekly review not only turns your writing schedule into an ongoing process, but it also gives you a chance to define and redefine your goals each week. That helps ensure that you never sit down to write without knowing your next move.

Keep Track of the Books and Sources

If your book requires substantial research, it’s easy to become overwhelmed by source information. Multiple books, articles, interviews, websites, and other sources can quickly pile up on your desk or in your hard drive.

The key is to create an organizational system before your research becomes more than you can manage. All of your notes and bibliography information should be saved in a single, easily referenced file. Some authors use a spreadsheet. Others keep their notes and sources in a text document, citation manager, or other system.

Start by listing all of the books you use for research. Note the author’s name and any publication information you may need later. This list can become the foundation of your bibliography. It also makes it easier to locate a source when you need to verify the information you’ve already gathered.

Don’t rely on your browser history, scattered notes, or memory to reconstruct your research later. Recording source information as you go is considerably easier than trying to recreate it at the end of the writing process.

Every time you note something that you may cite in your finished book, record the relevant page number right away. If you’re working with a digital source, save the corresponding location or other identifying information. For websites and social media, you might even take a screenshot of the information you’re noting. These pages are far less stable than print media, so build an archive of clipped information that you can reference later.

Organize your notes according to where they are most relevant to your manuscript. You might use chapter numbers, subject tags, or both. This allows you to easily pinpoint key information when you start a new chapter or section of your book.

How Many Books to Read for Research

There is no universal number of books that an author should read before writing a book. Your total research needs will depend on your subject, the complexity of your arguments, and how much original research you are conducting. 

The amount of research you need will also vary by genre and subject. A historical novel, for example, may require extensive source material, while another fiction project may rely primarily on the author’s own creative development.

Start by estimating the minimum number of substantial sources you need for each chapter. Then prioritize sources that directly support the chapter’s subject or your central argument.

Be cautious about adding too many books to your research pile. More sources are not automatically better, and continuing your research when you have all the information you need can simply delay your draft with minimal value added. Once your reading begins to produce fewer and fewer useful insights, it may be time to stop researching and start writing.

Nonfiction Workflow

A nonfiction book particularly benefits from a clear writing process that connects its arguments, evidence, and examples. Tracking these elements as you work can help prevent unsupported claims from appearing in your manuscript and reduce major revisions later.

Outline Argument Arcs for Each Chapter

Before drafting each chapter, identify its central argument, how it fits into your core promise, and the progression of ideas that will support it. Think about where the chapter begins, what you need to establish, and what you want the reader to understand by the end.

The purpose of a chapter outline is to give you a structure to work from so that individual sections don’t begin pulling the chapter in unrelated directions. It doesn’t have to be rigid, but it should help you lay out your chapter in a way that makes sense.

Map Evidence to Each Claim

Presenting clear evidence is an important part of crafting a compelling argument. Start by laying out your claims, then identifying the sources and information that support them. This could include published research, statistics, expert commentary, interviews, historical records, or other primary and secondary sources.

Mapping evidence while you draft makes it easier to spot gaps in your logic. If a significant claim has no supporting evidence, you can address it before the manuscript reaches the final editing stage.

Schedule Interviews for Primary Research

If your book relies on interviews or other primary research, schedule them early enough that they don’t become a bottleneck later in the writing process. Keep track of who you’ve contacted, who has agreed to participate, when interviews are scheduled, and which chapters may use the resulting material.

After each interview, record useful quotations, ideas, and follow-up questions while the conversation is still fresh. Store your interview notes with other sources, noting who you spoke with, when, and their credentials.

Draft Case Studies Early

If case studies are an important part of your book, drafting them early can help you determine whether your broader arguments are clear and whether you have enough evidence to support them. Early case studies can also reveal where additional research or interviews may be necessary before you complete the surrounding chapters.

Verify Facts Before Finalizing Drafts

Build fact-checking into your workflow by verifying statistics, names, dates, quotations, citations, and other important factual details as you work. This helps you avoid the mistake of building whole arguments around unverified information.

Mark anything you still need to verify so that unresolved questions don’t get lost during the revision process. This is particularly important when your manuscript draws from many sources or covers technical, historical, or rapidly changing subjects.

Keep Track of the Book’s Structure

A manuscript can change substantially between the initial outline and the finished draft. Your outline should evolve alongside the manuscript. As you add, remove, combine, or rearrange sections, update your chapter outline rather than continuing to reference the original version.

Give major sections and subsections clear numbers or labels, and briefly state the purpose of each one. A simple description such as “introduces the problem,” “provides historical context,” or “supports the main argument” can help you evaluate whether the section is doing necessary work.

This is especially useful when a manuscript becomes long or complicated.

Keep a running list of structural problems that need to be addressed. You might note that a chapter needs another example, that two sections repeat the same information, or that an argument needs additional support. Address some problems immediately, but collect others for a dedicated revision pass. Separating drafting from certain types of problem-solving can help you maintain momentum.

Use a Book Club to Test Ideas

Early readers can provide useful feedback before your manuscript is finished. If you don’t have access to a formal book club, you can simply engage a small group of readers who represent your intended audience. These early readers help you identify confusing sections, unanswered questions, and ideas that resonate.

Choose readers who are reasonably close to your intended audience. Give them a specific portion of the manuscript to review, such as early chapters. 

Rather than asking readers whether they “liked” a chapter, use specific questions to guide the discussion. Explain what kind of feedback you’re looking for, such as whether the chapter was easy to follow, where their attention dropped, or which ideas they wanted explained further. Ask what they understood, what surprised them, what felt unclear, and what questions remained unanswered. 

Use the same set of questions for each round of readers. This makes responses easier to compare and can help you identify recurring issues.

As you gather your reader feedback, make sure to keep it separate from your own revision decisions. While your readers can be invaluable in identifying problems in the manuscript, only you can decide which changes are best for the overall book.

Tools to Keep Track: Apps and Journals

There are many apps, tools, and approaches to tracking your writing progress, each with its own pros and cons. The good news is that you don’t need specialized software to keep a book on track. You can manage a book writing project effectively with a spreadsheet, word-processing document, project-management app, paper notebook, or dedicated writing software.

Ultimately, the best tracking system is one you will actually use.

Complexity can become another form of procrastination. A simple system that you update consistently is more useful than an elaborate system that you abandon.

Your system should make it easy to see deadlines, writing goals, research tasks, and outstanding revisions. If you use an app to track your writing, choose one primary system rather than moving between several. 

A reading journal is a great corresponding tool that allows you to capture ideas, questions, quotations, and connections you discover while researching. Include the source and location of important information so you can find it again later. Your journal might be paper or digital, but it doesn’t need to be polished. Its whole purpose is to preserve useful thoughts while you’re doing the work.

Back Up All Files to Cloud Storage

Something as simple as a hard drive failure, accidental deletion, coffee spill, or damaged device can quickly wipe out months of work. Always back up your manuscript, bibliography, and research with up-to-date copies stored online or in a secure physical location. 

For especially important projects, you might also consider maintaining more than one form of backup. 

Once a month, export and save a dated copy of your manuscript and major project files. Use clear filenames and dates so older versions are easy to identify. These files create a record of the book’s development while providing a reference point if you decide that a major change isn’t working and you need to return to a previous version.

Recover When Off Track

Even with a good writing system in place, you may fall behind. A missed deadline or unproductive week doesn’t mean the project is finished. It simply may mean that you need to reassess your plan and find a manageable way back into the work. 

Instead of trying to make up for lost time all at once, identify what interrupted your progress and create a manageable way back into the work.

Identify Reasons for Falling Behind

Before you try to get back on track, look at what actually caused the delay. Was the writing target unrealistic? Did research take longer than expected? Did another responsibility take priority? Did you get stuck on a particular chapter?

Answering these questions matters because the solution depends on the problem. If the schedule was unrealistic, adjust it. If you’re stuck on one section, determine what information or decision is preventing you from moving forward.

Prioritize the Next Three High-Impact Tasks

When you get stuck in a project that feels overwhelming, simply make a short list of the three tasks that will move the manuscript forward most significantly. Focus only on three tasks, and avoid filling the list with minor things to do simply because they are easy to complete.

Your goal is to reduce the distance between where the manuscript is now and where it needs to be, and sometimes just getting started will help to move the project forward again.

Set a Micro-Deadline to Restart Writing

It can be tempting to try to simply catch up, piling your missed deadlines on top of your current progress deadlines. Realistically, this rarely works, and it can only lead to more frustration. Instead, choose a small, specific deadline for getting back to work. Decide that you’ll write for 30 minutes tomorrow morning, finish one section by Wednesday, or complete a particular chapter by the end of the week.

Once you’re moving again, you can establish a new sustainable schedule. Keeping a book on track isn’t about maintaining perfect progress. It’s about having a system that makes it easier to notice when you’ve drifted and to find your way back.

Choosing Your Book’s Physical Specs: Trim Size and Binding Guide

Choosing Your Book’s Physical Specs: Trim Size and Binding Guide

graphic of a cloud of numbers in front of a backdrop of books

Writing a book is only one part of publishing. Formatting and packaging your manuscript into a physical book is a critical part of the publishing process. But a book is very different than a Word document; you can’t simply throw all the text into Microsoft Word and hit print. From trim sizes to binding options, there’s a lot to decide, and it all affects how your book is laid out, how it occupies space on the shelf, and how it feels in a reader’s hands.

This guide offers an introduction to choosing trim size and binding, and what those choices mean for your finished book.

Quick Checklist for Custom Book Specs

Before you choose the specs for your book, establish where you will sell your book, what formats you wish to see, and what you want your book to accomplish. Understanding your goals can help narrow your options.

  • Identify your intended formats and distribution channels. Not every printer or distribution platform offers every trim size, binding style, or format.
  • Decide whether you plan to publish a paperback, hardcover, or both. A paperback may suit a cost-conscious, portable book, while a hardcover can offer a more substantial presentation. Some books benefit from offering both formats.
  • Set a target budget per printed copy. Your production choices affect the per-copy cost of your book. Establishing a target cost before selecting specifications can help you avoid creating a book that is expensive to produce relative to its intended retail price.
  • Understand the sizes and formats common for your genre. Sizing standards vary by genre and audience. A child’s picture book will naturally be wider and taller than an adult paperback, but even a nonfiction book is often larger than a standard novel.

It’s also helpful to think about how readers will interact with your book. A novel that will be read cover to cover and set back on the shelf has different physical requirements than a cookbook, a photography book, or a workbook readers will return to repeatedly.

Book Trim Sizes and Book Sizes

A book’s trim size is the final height and width of its pages after the printed sheets have been folded, bound, and trimmed. In other words, it is the finished size of a printed book.

There is no single standard book size for every project. Common trade paperback sizes include:

  • 5” x 8”
  • 5.25” x 8”
  • 5.5” x 8.5”
  • 6” x 9”

Standard hardcover sizes for a fiction book include:

  • 5.5” x 8.5”
  • 6” x 9”

Nonfiction hardcover books are often a little larger, approximately 7” x 10”, while educational books and textbooks often come in around 8.5” x 11”.

Children’s picture books commonly include sizes such as:

  • 8.5″ x 8.5″
  • 8″ x 10″
  • 8.5″ x 11″

While your book can be printed in any size, some choices may affect your distribution options. If you plan to use print-on-demand services or a particular retailer, be sure to check their current specifications before choosing the size of your book. Not every platform allows for every print size, and you may want to choose a size available on all of your intended platforms. 

A large trim size generally refers to books larger than common trade formats, although the exact definition can vary by printer and genre. In some cases, it includes any book wider than 6” and taller than 9”. However, for some genres, such as nonfiction and children’s literature, this may be on the smaller end of typical trim sizes.

Beyond printing considerations, standard-sized books may also be more likely to get space on a retailer’s shelves, since they fit established shelving and reader expectations. 

How Trim Size Affects Page Count

Trim size has a direct effect on the number of pages your finished book will have. Smaller pages hold less text, which generally increases the total page count. A larger trim size provides more space per page, which can reduce the overall page count.

For example, a manuscript formatted at 5” x 8” will generally require more pages than the same manuscript printed at 6” x 9”, assuming the same type size, font, margins, and other formatting choices apply.

Page count can impact the cost to produce each book as well as the width of the spine. Long books printed in small size may be uncomfortably thick for a reader to hold, while a shorter book printed with a large trim size may feel insubstantial. That makes balance key to finding the right trim size and page count.

No matter what size you decide on, you’ll want to finalize your trim size before formatting your manuscript. Changing the trim size after the interior has been designed can interrupt the flow of text, change the page count, move images and other elements, and ultimately require a complete reformat or review. 

Large Trim Sizes and Cost Implications

While large trim sizes make sense for many books, choosing a larger trim size can impact production costs. Larger books may cost more per copy to produce, though they can sometimes command a higher retail price.

For text-based books, increasing the trim size will usually decrease the total page count, as each page allows more space for text. For image-based books with a predetermined number of pages, changing the trim size may not change the total number.

The following table illustrates how trim size and page count can affect estimated per-unit printing costs, using figures from IngramSpark’s Print and Ship calculator:

Trim Size Text-Based Book (Variable Pages) Image-Based Book (Set Pages)
5” x 8” $4.98 (250 Pages) $4.98 (250 Pages)
6” x 9” $4.07 (188 Pages) $4.98 (250 Pages)
7” x 10” $4.36 (140 Pages) $6.69 (250 Pages)

Because the total page count of the text-based book varies, the per-book printing price actually goes down for larger sizes. This is commonly the trade-off between trim size and page count, although it is not always guaranteed. For a book with a set page count, the largest trim size significantly increases the per-unit cost.

However, that higher price may be worth it for a book where presentation and visual space matter. Art books, photography books, cookbooks, illustrated nonfiction, and other image-heavy projects benefit from a larger format, even when it costs more to produce.

Consider how the finished dimensions will affect the reader’s experience, retail price, shipping, and distribution options. Page count and price per book are only the starting point.

Paper Stock and Image Printing

Paper is another physical specification that strongly affects a finished book’s appearance and feel. Printers may offer different paper stocks, weights, colors, and finishes depending on the book format and printing process.

Uncoated paper is commonly used for text-heavy books. It provides a traditional reading experience and is generally comfortable to read. 

Coated paper has a smoother surface. It can reproduce photographs and other detailed images effectively. It is also slightly more resistant to handling and incidental moisture, making it a good choice for cookbooks and reference books. However, coated paper availability may vary by printing process and book format.

Paper weight and opacity also matter. Heavier stock can give a book a more substantial feel, while lighter stock can help keep the book thinner and easier to handle. Lighter pages are common with novels and other books well served by portability. Heavier weights do well for reference books or visual books that are often displayed in one place.

Opacity matters most when selecting paper for books with substantial amounts of text or imagery. More opaque paper reduces the likelihood that those words and images show through from the opposite side of the page.

Request samples whenever possible, looking at both the paper stock and a finished example using your desired paper. This is especially important for photography and other image-heavy books, where the paper and printing techniques can impact the quality of your photographs.

Image Printing for Photo-Heavy Books

If your book features a number of images, choose your paper and printing processes with them in mind. Photographs generally benefit from full-color printing and paper stock that reproduces detail, contrast, and color accurately.

Luster or semi-gloss paper is a popular choice for photography books. Also prepare your images at the resolution your printer recommends. 300 PPI is a common target for photographs and other raster images, but always follow your specific printer’s file requirements.

You should also request a physical proof, allowing you to examine some or all of your printed pages before finalizing your book. A digital image can look substantially different when printed on paper, making it essential to see a representation of the final book in person.

Binding Style and Binding Styles Explained

A book’s binding is how its pages are assembled into the finished book. The appropriate binding method depends on the book’s format, page count, intended use, and production budget.

Perfect binding is a common paperback binding method in which individual pages are gathered together and attached directly to the cover with a flexible adhesive. It produces a clean, smooth spine and is the industry standard for novels, memoirs, and other paperback books as well as many magazines, catalogs, and manuals. The minimum page count for perfect-bound books is often around 24 pages, though requirements may vary by printer.

Smyth sewn binding stitches sections of pages together before assembling the book. This traditional book construction method often offers better durability and flexibility than adhesive-only methods. It can also allow a book to open more comfortably. Sewn binding is often recommended for books that will be used frequently or for long periods.

The binding method you choose can impact the width of your book’s spine. Spine width also depends on factors such as page count and paper thickness. Calculate the final spine measurement using the printer’s specifications, not trim size alone.

When choosing your binding style, consider how the reader will use your book. A perfect-bound paperback may be perfect for a novel intended for casual reading, while a durable sewn binding may be better for a reference book, journal, or other text that will be handled often.

Custom Book Binding Options

Additional binding and cover options, such as a dust jacket or custom end sheets, can transform a hardcover book’s appearance.

A dust jacket adds a separate printed cover around the hard cover. It not only protects the bound book, but also adds additional space for the book’s title, author information, description, and artwork.

End sheets are the sheets of paper that connect the book’s interior pages to its cover. End sheets can be available in different paper weights and colors, allowing authors one more design choice that complements the book’s overall presentation.

It’s important to note that not all printers offer the same customization options. Print-on-demand options, for example, may be limited. If you want a particular end sheet color, paper weight, dust jacket, or other feature, confirm that it is available for your selected binding and distribution method before you design your book around it. 

Custom Book Cover Finishes and Cover Finish Choices

Your book’s cover is the first thing most readers encounter, so its finish can noticeably affect the book’s appearance and feel. 

Gloss film lamination creates a smooth, shiny surface that can make colors and images appear bright and saturated. It can also help to protect the book’s cover and contents from moisture and repeated handling.

Matte finish has a less reflective surface, producing a softer, more understated appearance. Matte covers can be easier to view under bright lighting because they produce less glare. 

Soft-touch finish adds a smooth, velvety feel to a book’s cover. It can create a distinctive experience for the reader, though availability and cost vary by printer.

When choosing your cover finish, consider your book’s genre, artwork, intended audience, and budget, as well as the available options from your printer. Request samples whenever possible so that you can evaluate the actual finished effect rather than solely relying on a digital proof.

Preparing Files for Printing: Book Trim Size and Formats

Once you’ve decided on your book’s physical specifications, you can prepare your interior and cover files for production. Requirements vary by printer, so always consult your chosen printer’s requirements before you start.

Start by setting the document’s page size to the final trim size of the book. Do not simply format your manuscript on standard letter-size pages and expect your printer to resize it automatically.

If artwork or other elements extend to the edge of the finished page, you’ll need to add bleed according to your printer’s specifications. Bleed creates extra image or background area beyond the trim line so small shifts during cutting don’t leave unwanted white edges.

Always finalize your interior before starting on your cover, as your final page count and paper selection will impact your spine width and cover size. Use your printer’s specifications to calculate the final cover size, including the back cover, spine, and front cover.

Before exporting your final PDF, make sure fonts are embedded and that all images meet the printer’s required resolution and color specifications. Some printing workflows require or recommend CMYK color for images, while others handle color conversion as part of the production process. Follow the specific requirements of the printer or platform you are using rather than applying a universal color setting. 

Choosing Specs for Nonfiction

Nonfiction includes many types of books, so the ideal physical specifications depend on the content and use.

Narrative nonfiction, such as memoirs, biographies, essays, and other primarily text-based books, often works well in compact, traditional book sizes like those for novels. A smaller format can create a comfortable reading experience while keeping the book relatively portable.

Illustrative nonfiction may benefit from a larger trim size. Books containing artwork, photographs, diagrams, charts, maps, or other visual material need enough page space for those elements to be visually effective and, in many cases, legible.

For books that combine elements of narrative and illustrative nonfiction, you’ll want to consider the relationship between the two. A larger page may allow more room for an important image, but it will also change how the text sits on the page. 

The best nonfiction specifications balance presenting the content well with supporting how readers are expected to use the book.

Testing, Proofing, and Quality Checks

When possible, always order a physical proof copy of a book before approving a final print run. A physical book can look and feel very different from an image on a screen, so evaluate the actual book rather than relying on a digital PDF proof.

Once you have your book in hand, thoroughly examine it to make sure that it meets your expectations and quality standards:

  • Check the interior. Read and review multiple interior pages. Look for issues with the margins, page breaks, image quality, color reproduction, text alignment, and any elements that appear too close to the trim edge.
  • Examine the binding. Make sure that the pages are securely attached, that the cover and spine are aligned correctly, and that the book opens as expected for its binding style.
  • Inspect the cover. Consider the cover finish and lamination. Look for scratches, bubbles, uneven application, unexpected glare, or other production issues.

A proof is more than a box to check before you send your book to print. It’s an opportunity to ensure your book’s quality, catching and correcting problems before they reach your readers.

Final Checklist Before Upload

Before submitting your files for printing or distribution, take the time to review your specifications one more time.

Below is a final checklist before uploading your files:

  • Confirm that the book trim size matches the requirements of your chosen printer or distribution platform.
  • Verify that your selected binding style is available and compatible with your intended format.
  • Finalize your paper choices, including weight, color, and any relevant opacity or finish considerations.
  • Finalize your cover finish decision, such as gloss, matte, or soft-touch lamination.
  • Confirm the final page count and use it to verify the spine width.
  • Check that the interior and cover files include the required bleed and margins.
  • Confirm that fonts are embedded and images meet the printer’s resolution and color requirements.
  • Order and review a physical proof copy before approving a larger print run.
  • Estimate the final printing cost per copy and make sure it works with your planned retail price and margins.

Choosing the physical specifications of your book early makes the rest of the production process much easier. When you select trim size, paper, binding, and cover treatments with the book’s content and intended use in mind, the final product is more likely to look intentional, feel appropriate in the reader’s hands, and fit the realities of your publishing budget.

What Goes On a Book’s Copyright Page

What Goes On a Book’s Copyright Page

typewritten word “copyright” isolated on a white paper page

A book’s copyright page provides important legal and practical information about its publication. There’s no single required format for a copyright page, or even what must be included. In fact, in the United States, even a copyright notice isn’t necessary because an author’s work is generally protected by established laws. 

Both independent authors and publishers still choose to include copyright page information in their books for several reasons. Copyright pages follow a long-standing tradition, establish and communicate copyright ownership, document important publication details, and provide useful information to booksellers, libraries, and retailers.

Typically placed directly after the title page, a copyright page may include:

  • Copyright notice
  • Publisher or imprint information
  • ISBN for published formats
  • Legal notices, permissions, and credits
  • Cataloging information
  • Author information
  • Edition and printing details

Traditionally published books often contain all of these details and more. Independent authors may include some or all of them, depending on how their book is published and the information they want to provide.

No matter what you include or leave out, the key is to keep your copyright page compact, clear, and professional. In this article, we explore the common elements of a book’s copyright page to help you decide what to include in your self-published book.

Copyright Page Basics

The primary purpose of a copyright page is to communicate ownership over a book’s contents. It also provides a convenient location for key publication and bibliographic information.

At a minimum, most copyright pages include a copyright notice, edition information (if applicable), and a list of ISBNs (International Standard Book Numbers) for each published format. 

Copyright Notice

A copyright notice identifies the book’s copyright holder and its original publication year. A standard copyright notice contains three elements:. 

  1. The word “Copyright” or the copyright symbol (©). The abbreviation “Copr.” may also be used.
  2. The original year of publication. If your book has gone through multiple revisions or editions, you may wish to include multiple years.
  3. The name of the copyright holder. Depending on your publishing arrangement, this may be you, your publisher, or another entity.

For example: © 2026 Anna B. Author

Although a copyright notice is not required for protection in the United States, including one explicitly asserts those rights and identifies the person or entity to whom they belong.

Many authors also include a rights statement following the copyright notice. This may be as simple as “All rights reserved.” Others use a longer statement that outlines restrictions and provides a way to request permission.

For example: No portion of this book may be reproduced or transmitted in any form without prior written permission of the publisher, except as allowed by U.S. copyright law and fair use. For permission requests, contact the publisher.

If you use a similar statement, it is recommended that you also provide contact information for yourself or your publisher.

Copyright Symbol

The copyright symbol is generally represented by a small letter C enclosed in a circle. Many word processing programs allow you to insert this symbol through a symbol or special characters menu.

If the official copyright symbol is not available, you can also substitute a capital letter C encapsulated in parentheses: (C). Many word processing programs will also automatically convert this combination into the standard copyright symbol.

Pen Name

If you choose to write under a pen name, your copyright page may list your chosen author name. 

However,  if you need to legally register the copyright for your book, it is often recommended that you do so under your legal name. Authors should follow the US Copyright Office’s requirements for a book published under a pseudonym.

In any case, your copyright page should represent your author name as required by your publishing arrangement and how you want to identify yourself as an author.

Legal Notices, Permissions, and Credits

Depending on the type of book and its contents, the copyright page may include legal disclaimers, permissions information, contributor credits, and trademark notices.

For many books, a disclaimer can help clarify the nature and intended use of the book and its contents. The type of disclaimer you use will largely depend on the type of book you have written.

In fiction, it is common for authors to note that characters, places, and events are a result of the author’s imagination and that any resemblance to real people, places, and situations is purely coincidental. Historical fiction may require additional clarification, especially when it includes real historical figures, places, and events. Authors may explain that, while real people or situations may appear in the book, their portrayal has been fictionalized.

For nonfiction, many authors note that a book’s content is based on the author’s own experiences or research and is intended for informational or entertainment purposes only. Memoirs and other personal works may also explain that names, identifying details, and timelines may have been compressed or changed for privacy, clarity, or storytelling purposes.

The copyright page can also be a key place to acknowledge additional authors, copyright holders, and contributors to the publication.

If your book includes quotes, passages, or characters trademarked by another entity, you may need permission to use that material. Many authors also note those permissions on the copyright page to indicate that those elements were used with permission and to credit the copyright holders appropriately.

It’s also common to credit contributors such as designers and illustrators on the copyright page, as well as to add trademark notices where applicable. Trademark notices should identify all registered and pending trademarks, including both those belonging to the author and those registered to someone else. 

Library Of Congress Control Number (Congress Control Number)

A Library of Congress Control Number (LCCN) is a unique identifier assigned to a publication when a catalog record is created by the Library of Congress. Unlike an ISBN, an LCCN does not vary by book format; instead, a single number references the work as a whole. 

An LCCN isn’t required to publish a book, so many indie authors choose not to obtain one. However, an LCCN is free, and eligible authors can apply for it through the Pre-Assigned Control Number program. 

Most of the time, you must request an LCCN before publication. After publication, a book may only receive an LCCN if it is independently selected by the Library of Congress for acquisition and inclusion in its collection.

Cataloging Data Block (CIP / Data Block)

A cataloging data block, also known as a “Cataloging-in-Publication” or CIP data block, is a standardized set of information to help librarians, booksellers, and wholesalers classify and catalog the book. A CIP data block is typically issued by the Library of Congress or another national library.

If you receive an official CIP data block, it should be entered into the copyright page exactly as it is issued.

A standard CIP data block includes:

  • Author information: The primary author’s name (formatted as last name, first name), often followed by their birth year.
  • Title and publisher: The book’s full primary title, subtitle, and publisher information.
  • Identifiers: ISBN, LCCN, and other unique identifiers if applicable.
  • Subjects: A standardized subject heading to describe the book’s topic.
  • Classification numbers: Dewey decimal and other library classification information.

These details may not be critical to most readers, but librarians, wholesalers, and book retailers use them to quickly assess and categorize books within their collections. Including this information can also help authors get their books onto shelves faster, as booksellers and librarians don’t have to spend hours gathering those details.

P-CIP data blocks mimic the data blocks issued by the Library of Congress but come from independent vendors rather than a national library.

Archives Canada

Library and Archives Canada (LAC) is the national library of Canada. It collects and catalogs materials created and made publicly available in Canada.

Publishers, including self-published authors publishing in Canada, may be legally required to deposit any new works to the Archives Canada collection. That includes a copy of any physical books, serials (such as magazines and journals), audiobooks, and ebooks.

Self-published authors and publishers outside of Canada may also submit their work for the collection, but are not generally subject to Canada’s legal deposit requirements.

Because submission to LAC typically happens after publication, LAC information is not generally a standard element of the copyright page. If you wish to note that your book was or will be deposited to LAC, you can use the ISBN as the identifier.

Edition Information and Printing Details

Many books, especially nonfiction books, are periodically updated and re-released as new editions. Including edition information on the copyright page helps readers, booksellers, and libraries distinguish one version of the book from the other.

Many authors do not include detailed edition information for a book’s first printing. However, you may want to include that information in subsequent printings. Simply state the edition number and the publication year.

For example: Second edition, 2027.

Some authors also choose to include the month, especially if two or more editions are released in the same year. 

A printer’s key, or number line, may also identify a particular printing. If your publisher uses one, include it on the copyright page as appropriate.

It’s also helpful to note the country where the book was printed. 

For example: Printed in the United States of America.

ISBNs and Ordering Information

An ISBN, or International Standard Book Number, is a unique identifier that lets librarians and booksellers purchase, organize, and manage books by title and format. 

An ISBN is assigned at the product level, so different formats and editions of a book typically have separate ISBNs.

Many authors choose to list each ISBN on the copyright page. Each ISBN should be noted alongside its format, such as:

ISBN: 978-00-00000-00-0 (Hardcover)

ISBN: 978-00-00000-00-0 (Paperback)

ISBN: 978-00-00000-00-0 (2nd Edition Hardcover)

Listing ISBNs in this way lets readers, booksellers, and librarians know that the book is available in other formats. 

If you expect to sell your book in bulk or to classrooms, you may want to also consider including ordering information or a contact method on the copyright page.

Publisher, Imprint, and Noble Press Example

The publisher or imprint identifies the entity responsible for producing and distributing a book. Displaying this information on the copyright page also gives readers and booksellers a clear point of reference for the publication.

The publisher’s name should be clearly displayed along with a contact address or other relevant information when available. For example:

Noble Press

320 Water St., Box 700

Conneaut Lake, Pennsylvania 16316

www.noble-press-publishing.com

Author Website and Contact

As authors become increasingly connected to their audiences through multiple channels, it is common to include the author’s website and contact information on a book’s copyright page.

Many authors will list their website URL, allowing readers, librarians, and booksellers to easily learn more about them and their work. 

Authors should only include a professional email address if they personally accept inquiries related to the book’s copyright.

Copyright Page Templates

Copyright pages vary widely in complexity. Traditionally-published or multi-contributor works may fill an entire page with relevant information, while some self-published works contain little more than a copyright notice and basic publication details.

There is no single format that works for every book. The following examples show how commonly used copyright page elements can be arranged. Your copyright page may require different information depending on your book, publisher, and distribution strategies.

Simple Self-Published Copyright Page Template

© 2026 Anna B. Author. All rights reserved.

Printed in the United States of America.

ISBN: 978-00-00000-00-0 (Hardcover)

ISBN: 978-00-00000-00-0 (Paperback)

First printing, 2026.

Noble Press

Conneaut Lake, PA 16316

Traditionally-Published Copyright Page Template

© 2026 Anna B. Author. 

All rights reserved. No portion of this book may be reproduced or transmitted in any form without prior written permission of the publisher, except as allowed by U.S. copyright law and fair use. For permission requests, contact the publisher at the address below.

Printed in the United States of America.

ISBN: 978-00-00000-00-0 (Hardcover)

ISBN: 978-00-00000-00-0 (Paperback)

Library of Congress Control Number: 000000000000

This book is a work of fiction. All characters, places, and events are the product of the author’s imagination. Any resemblance to actual people (living or dead), events, or places is purely coincidental.

Book design by Book D. Signer

Front cover art by Patty J. Artist

First printing, 2026.

Noble Press

320 Water St., Box 700

Conneaut Lake, Pennsylvania 16316

www.noble-press-publishing.com

Final Checks Before Printing

Before printing your book, make sure that you do a final check of your copyright page to make sure all information is included and accurate.

Carefully review all names, ISBNs, edition information, publishing details, cataloging numbers, and dates. Confirm that all permissions and credits have been documented, and verify that all information matches the details on your registration records.

Taking the time to verify these details not only helps librarians and booksellers locate and categorize your work, but also builds confidence in your self-published book by presenting a professional image that elevates your author profile.

How BISAC Codes, Categories, and Keywords Decide Whether Readers Find Your Book

How BISAC Codes, Categories, and Keywords Decide Whether Readers Find Your Book

corner of a bookstore with stocked shelves and a featured table with stacks of books in front of it

It’s easy to think a great book will naturally find its way into readers’ hands, but it’s rarely that simple. A book’s discoverability requires more than a compelling story and an eye-catching cover. The way your book is categorized and described online is a critical part of how readers, booksellers, and retailers find it.

One important part of that process is a system of subject identifiers known as Book Industry Standards and Communications (BISAC) codes. The publishing industry uses BISAC codes to organize texts by genre and subject matter.

While BISAC codes may not mean much to the average reader, they do play an important role in helping those readers discover your book. The right BISAC codes can help retailers and booksellers understand where your book belongs, position it among similar titles, and help interested readers find it.

BISAC codes are only one part of your book’s metadata, however. Your subject categories, keywords, and other details work together to describe your book and help it reach its intended audience.

In this guide, we’ll break down what BISAC codes are, how they impact your book’s discoverability, and how to make sure your metadata accurately represents your book and reaches your intended readers.

Quick Overview of BISAC Codes and Subject Matter

A BISAC code is a nine-character alphanumeric identifier that publishers, librarians, and booksellers use to categorize and organize books by subject. The codes are developed and managed by the Book Industry Study Group (BISG).

Having the right BISAC codes attached to your book is important for placing your book in the right category on a retailer’s shelves or website. Because BISAC codes describe a book’s subject matter, they give librarians and booksellers a standardized way to understand what a book is about and, in some cases, who the intended audience may be.

Some books covering multiple subjects have more than one BISAC code. However, BISG best practices suggest using no more than three codes per book. Many books can be accurately represented with a single, highly specific subject code.

BISAC codes are updated annually. The BISG reviews the existing codes each fall, updating existing subjects and adding new ones as needed. Authors should periodically review current BISAC guidelines and their book’s metadata to ensure that their book is still correctly categorized for new readers and booksellers.

Start Here: Use the BISAC Subject Heading List on the BISG Website

BISAC codes are not automatically assigned to a book. Instead, the author or publisher selects the subjects that best represent the book. There is no fee to use BISAC codes, and no special permissions are required. The current BISAC subject heading list is available through the BISG website.

To find the right BISAC codes for your book, start by reviewing the BISAC subject heading list. Subjects are organized by broad categories and then divided into increasingly specific topics. This structure allows you to move from a general subject to a more precise description of your book.

The more specific and accurate your BISAC codes are, the more clearly they communicate your book’s subject to potential readers and booksellers. For example, a book about nature could potentially fall into a broad “nature” category, while a book about desert ecosystems could use the BISAC code NAT045010 (Nature / Ecosystems & Habitats / Deserts). The book is still about nature, but that more specific code distinguishes it from books about fossils, caves, or wildlife. 

As you review the list, look for the subject headings that most closely match your book. Pay attention to new BISAC codes, which may be marked with an asterisk or other indicator. New codes may not yet be fully integrated into the wider publishing network, so authors may want to pair a newer, highly specific code with a more established subject when appropriate.

Identify Your Book’s Core Subject Matter and Target Audience

Before looking through BISAC codes, take some time to identify exactly what your book is about. 

Make a list of your book’s primary topics, themes, genres, and subjects. Then consider who is most likely to read the book and what those readers are looking for.

Setting, genre, content, and intended audience all matter in choosing a BISAC code. For example, a mystery novel set in a restaurant kitchen could potentially be categorized in different ways depending on its focus and writing style. A matter-of-fact police procedural (FIC022020) will fall under a different subject than a cozy culinary mystery (FIC022130) or a fun detective story written for juvenile audiences (JUV028000).

Once you’veidentified your book’s major themes and audience, you can compare those characteristics with the BISAC subject heading list. This gives you a starting point to identify the codes that best describe your book.

Two-Step Selection Process for Subject Codes

To choose your subject codes, start with the highest-level category that applies to your book, such as Fiction or Travel. Keep in mind that fiction is divided into categories by audience age level, including general fiction, juvenile fiction, and young adult fiction. 

After you select a category, look through the specific subject codes available within it. Most BISAC codes feature multiple levels of specificity, allowing you to easily move from a broad subject to a more precise one.

Create a short list of three to five potential subject codes. Rank your list by how well each option represents your book and your target audience.

BISG recommends having no more than three codes per book. In many cases, one well-chosen code is enough.

Drill Deeper: Choose the Most Specific BISAC Codes

When selecting BISAC codes for your book, it’s important to be as specific as possible. If a general category and a more precise subject both apply to your book, the specific category will usually provide a clearer description of the book’s subject.

Specificity can also help you reach niche audiences. A reader searching for a particular subject is more likely to benefit from a specific subject code than a general category that encompasses many unrelated books.

Fiction books should always begin with the BISAC fiction categories, while nonfiction books should use the relevant nonfiction subject categories. While books can have more than one BISAC code, do not mix fiction and non-fiction codes for the same book. Keeping the codes consistent with the book’s format and content helps prevent confusion about where the book belongs.

Picking the Primary BISAC Code and Ordering Subject Codes

If your book has more than one BISAC code, you’ll need to designate one as the primary subject code. 

Your primary BISAC code should be the one that most represents your book’s central subject or genre and is most relevant to your intended audience. This is particularly important as some retailers use only the first BISAC code to determine a book’s placement.

Any remaining codes should be ordered by secondary importance. The goal is to give retailers, booksellers, and readers a clear picture of what your book is about rather than attempting to capture every possible topic mentioned in its pages.

When to Use Non-Classifiable or General Subjects

While most books can be assigned to a specific BISAC subject code, there are some instances in which a title may require a non-classifiable or general subject code. 

Blank books, for example, may use the code NON000000: NON-CLASSIFIABLE.

For books that contain substantive content, however, a specific subject should generally be used when available. A non-fiction book about all kinds of pets, for example, may be classified as PET000000 (PETS / General) if none of the specific subcategories, such as dogs, cats, horses, or amphibians, accurately capture the broad scope of the book.

The key is accuracy. Don’t use a general code just because a specific subject requires more research.

Keywords, Amazon Categories, and Metadata Interaction

BISAC codes and keywords both help with the discoverability of your book, but they serve different purposes.

While BISAC codes help retailers and librarians understand where to place your book, keywords help to ensure that readers can find it through online searches. Your BISAC subjects do not necessarily need to appear verbatim in your keyword list, although they can be useful keyword terms. 

For example, an appropriate BISAC code for a young adult fantasy novel might be YAF019020 (YOUNG ADULT FICTION / Fantasy / Dark Fantasy). “Dark fantasy” could also be an important keyword to include in your book’s metadata, as it describes the type of story a reader might actively search for.

The most important thing is that your metadata is cohesive, with each element working as a separate signal pointing to the same place. When your keywords and BISAC subjects accurately reflect the same book, they reinforce the overall presentation and placement of your title. 

When preparing a book listing for Amazon and other online retailers, enter the primary BISAC code first in the appropriate metadata fields, followed by secondary subject codes and any relevant keywords as required by the platform.

New Codes and Requesting Changes Via the BISG Website

BISG reviews current and requested codes each fall, issuing an updated list of BISAC codes for ongoing use.

If your book covers a subject that does not appear in the current BISAC list, you can review BISG’s process for requesting a new subject. BISG does not typically create a new code for a single title. It is more likely to add a code when there is enough evidence to represent a broader need. 

If you request a new code, it’s helpful to provide broad examples that clearly demonstrate the need across multiple books or publishing contexts. Because the codes are updated annually, it’s also helpful to check the BISG periodically for updates rather than relying indefinitely on an older list.

Consistency Across Formats and Distribution

Because BISAC codes reflect the subject matter of your book rather than a specific format or edition, it’s important to use consistent subject codes across all retailers, formats, and editions. 

Before publishing, verify that the BISAC information in your distributor and retailer listings matches the metadata you selected. If you decide to change your subject codes later, make sure you update all listings, including distributor records.

Consistent metadata makes it easier for retailers and distributors to accurately represent your book across different formats.

Monitor Performance and Test Adjustments

BISAC codes are an important part of a book’s discoverability, but they’re not necessarily permanent.

As you monitor your book’s sales and discoverability, you may find that one subject description more accurately reflects how readers are finding and engaging with your book than another. New BISAC codes may also provide a more specific way to describe your book and connect with its target audience. Reviewing your metadata periodically can help you identify opportunities for improvement. 

Authors should review their sales and discoverability data on a regular basis, such as quarterly. If a book appears to be underperforming in its current subject area, consider whether an alternate BISAC code better represents its contents and audience.

You’ll want to make changes carefully, however. Metadata should change only when necessary, not in response to short-term fluctuations. If you test a different subject code, give the change enough time to produce meaningful information before you make any other adjustments. 

Common Mistakes to Avoid with Subject Codes

Some of the most common mistakes authors make with subject codes include:

  • Choosing a general category when a more appropriate specific category exists.
  • Mixing adult and juvenile age brackets, which confuses the intended audience.
  • Including conflicting fiction and nonfiction codes on the same book. 
  • Choosing subject codes based on a minor element of the book rather than its primary subject or genre.
  • Overloading keywords with repeated BISAC labels instead of using related terms.
  • Using different BISAC information across distributors and retailer listings.

The key is to keep your BISAC codes simple, accurate, and consistent. Your metadata does not need to describe every detail of your book. It simply needs to give readers and the publishing ecosystem an accurate picture of what the book is and who it’s for.

Practical Examples and Mini Case Studies

The best way to understand BISAC codes is to see how they work in practice. Consider these examples:

Example 1: A Biography

Imagine you have written a biography of a well-known American jazz musician. The book covers the musician’s childhood, career, recordings, major performances, and influence on American music.

For a book focused primarily on the musician’s life and career, BIO004000 (Biography & Autobiography / Music) could be an appropriate primary BISAC code. BISG also provides other biography subjects, such as BIO005000 (Biography & Autobiography / Entertainment & Performing Arts) that may be appropriate depending on the person and the focus of the book.

The important consideration is the book’s primary focus. If the book is fundamentally a biography of the musician, a biography subject should take priority over a general music category. If the book instead examines the development of jazz as a genre and uses the musician primarily as a case study, a music subject may be more appropriate.

The BISAC code should describe what the book fundamentally is, not simply one topic that appears in it.

Example 2: A Mystery Novel

Now imagine a mystery novel about a pastry chef who discovers a body in the kitchen of a small-town bakery.

The book’s setting includes food and cooking, but its primary genre is mystery. If the novel has the characteristics of a cozy culinary mystery, FIC022130 (Fiction / Mystery & Detective / Cozy / Culinary) could be an appropriate subject code. If the story is instead a more traditional mystery, police procedural, or another type of mystery, a different code within the Mystery & Detective category may be more accurate.

The protagonist being a pastry chef does not automatically make the book a cooking title. Its primary BISAC code should reflect the book’s actual genre and subject, while details such as the bakery setting or culinary themes can be reinforced through keywords and other metadata.

This is a good example of why choosing a BISAC code requires looking at the whole book rather than simply choosing the most frequent subject.

Example 3: How Keywords Can Change Discoverability

Consider a young adult novel about a teenager who discovers that the abandoned amusement park in her town is haunted.

The book’s BISAC subject might identify it as young adult supernatural fiction using code YAF045000 (Young Adult Fiction / Paranormal, Occult & Supernatural). While this code accurately groups the title with other YA paranormal books, it doesn’t give any more insight into its contents.

Keywords can capture a book’s more distinctive elements, helping to distinguish it from others in the same category. They also give readers additional ways to find your book through online searches. “Haunted amusement park,” “teen ghost story,” or “abandoned amusement park” give your book a better chance of appearing when readers search for those specific topics.

The goal isn’t to fill the metadata with every possible search term, but to provide additional language that connects the book with the ways its intended readers might describe or search for it.

Metadata Entry Checklist Before Publishing

When you’re ready to publish your book, make BISAC codes part of your publishing checklist. Take the time not only to choose the metadata that best represents your title, but also to review it before publication. You’ll want to catch any errors and inconsistencies before your book reaches retailers and distributors.

Before submitting your metadata, make sure that:

  • Your primary subject code is listed first in where required.
  • Secondary codes are listed in order of importance.
  • Your subject codes accurately reflect your book’s subject or genre.
  • You’ve chosen the most specific subject codes available rather than a general category.
  • Your codes are correctly classified as fiction or nonfiction.
  • Your codes reflect the intended audience by age.
  • Your keywords complement your BISAC subjects rather than repeating them.
  • All metadata is consistent across retailers, platforms, and formats.

After publication, take a moment to check your book’s retailer listings as well. Confirm that the information appears as expected and that the categories assigned by individual retailers accurately reflect your chosen metadata.

It’s also important to also note that metadata isn’t something to set and forget about. As your book moves through the publishing process, check your listings regularly to help prevent small metadata issues from becoming bigger discoverability problems.

Final Resources and Next Steps

Choosing BISAC codes doesn’t have to be complicated. Start with the official BISAC heading list published by the Book Industry Study Group (BISG) and use it to identify the subjects that most accurately describe your book.

Once you’ve selected your codes, keep a record of them along with your other publishing metadata. Documenting your primary and secondary BISAC subjects can make future updates much easier, especially if you publish your book in multiple formats and editions. It can also help you compare your original data with the updated subject codes released by BISG each year.

It’s also worth making metadata review part of your regular publishing routine. Schedule an annual check-in to review the current BISAC subject list, confirm that your selected codes and keywords still accurately describe your book, and make sure your metadata remains consistent across your distribution channels.

Your BISAC codes and keywords may not be something readers notice when they pick up your book, but they are an important part of the information that helps the publishing industry understand where your book belongs. Taking the time to choose them thoughtfully can help connect your book with readers looking for it.